Save a Session
Save a session to keep its diagnostic data for later.
Before You Start
You need access to the session's application in Video Inspector. For account access and team member permissions, see Manage Your Team.
By default, an account can save up to 1,000 sessions for up to 24 months. Save the session before its original data expires.
Save the Data
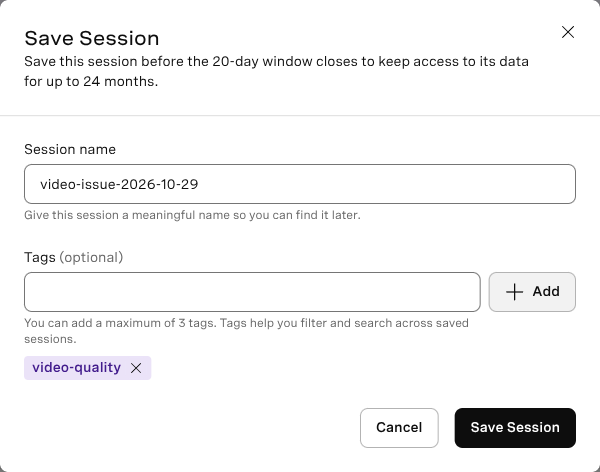
- Find the session in Meetings list and choose its save action, or open the session and select Save session in the session summary.
- Enter a name, such as
video-issue-2026-10-29. You can use up to 25 characters: letters, numbers, hyphens, and underscores. - Add up to three tags, such as
video-quality,reconnection, or a case reference, to help you recognize related sessions. Each tag can have up to 25 characters. - Select Save Session. The saved badge appears when the request is accepted, while data is still being stored in the background.
- Reopen the saved entry from Meetings list and check that the graphs and records you need are present.
Find a Saved Session
In Meetings list, look for the name and tags in the Saved column. Open the session ID in that row to view the saved data. The entry remains in the list until the saved copy expires.
To find an older entry, set Time Range to All time and clear filters such as In progress or Recently inspected (<3 days). You can also search by Session ID or Issue ID. Names and tags help identify rows in the list, but aren't searchable.
Update or Remove an Entry
To change the name or tags, select Edit in the saved-session summary. The saved data and expiry date stay the same.
Select Delete to remove a saved session permanently, then confirm in the dialog.
For missing timeline data in older saved sessions, see Missing Data and Limits.