Video + AI: Live Translations With Audio Connector
Time to read: 5 minutes
Imagine being on a video call with people from all over the world speaking their own native language and everyone understands each other. The speaker's audio is translated into text that the other participants can read in their own language. In this blog post, we will walk through how we can make this happen. One of the main components is the new Audio Connector feature just released.
In short, with Audio Connector, the audio streams from your routed video call sessions can be sent individually (A, B) or combined (A+B) to a WebSocket server for up to 50 total streams.
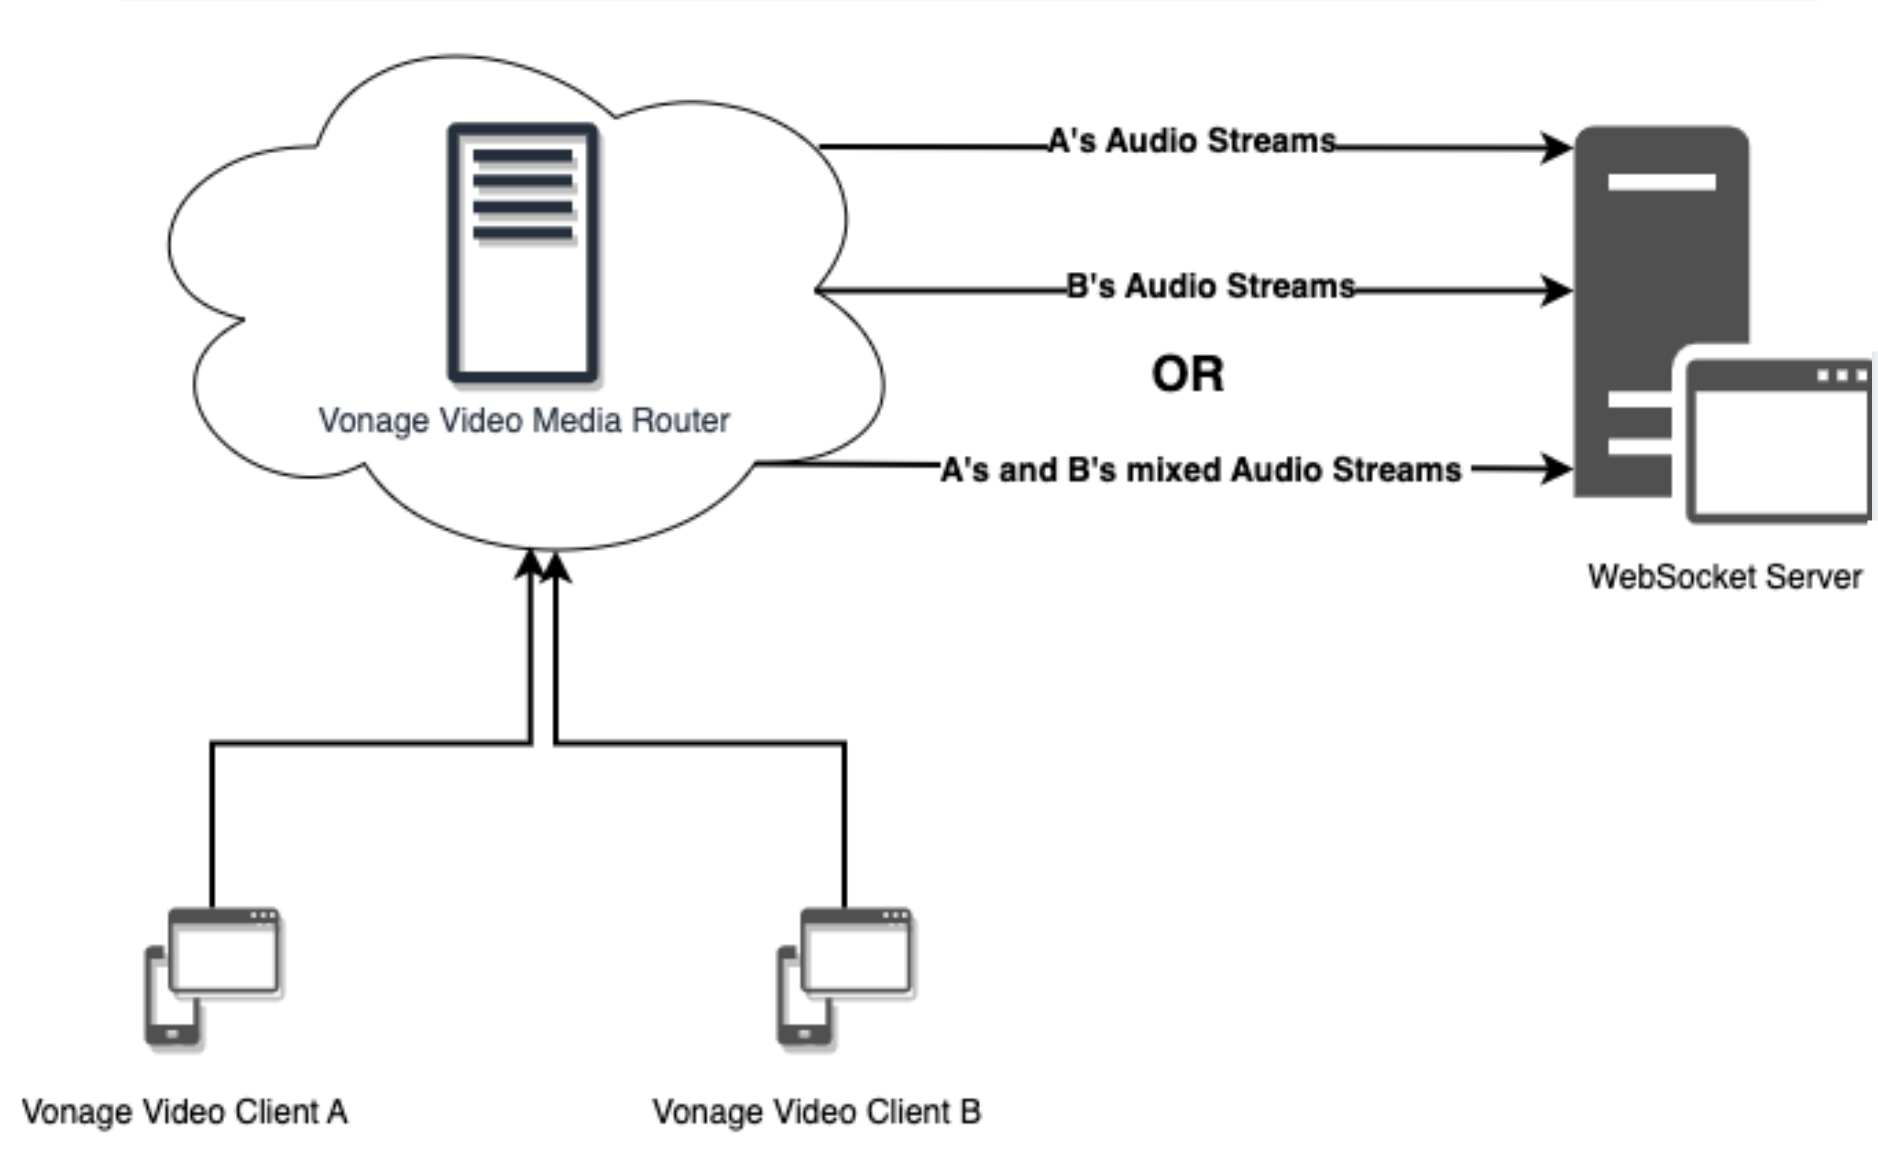 Audio Connector Diagram
There is no feature flag or switch to turn on to start using Audio Connector. It is enabled by default, and priced based on the number of participant audio streams sent. All we have to do is create a WebSocket server to receive the audio streams.
Being able to isolate and analyze audio streams opens up a lot of new possibilities. One that we will discuss in this blog post will be using Artificial Intelligence to do real-time translations with Microsoft's Azure AI Speech Service.
If you want to see the code and a demo in action, you can view the GitHub repository for a NodeJS-based application. With a click of the deploy button and entering some credentials, you will be able to experience real-time live translations in a video call.
As mentioned previously, you will need some credentials to run the demo application.
You can find the Vonage Video API Key and Secret in the dashboard, either in a previous project or a newly created one.
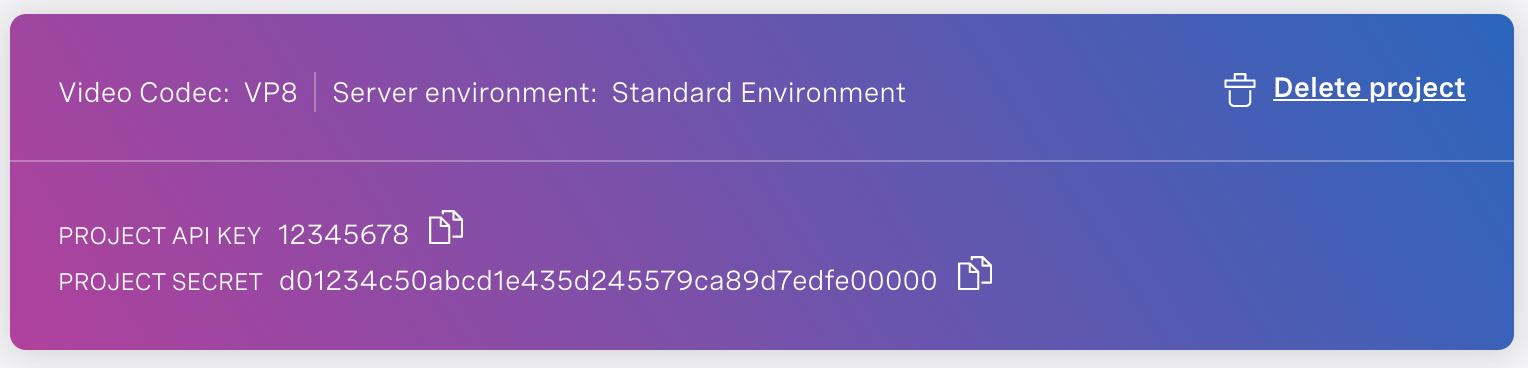 Vonage Project Credentials
On the Microsoft side, you will need to create a Speech Services resource in the Azure portal. Once created, you will need one of the Keys (either one is fine) and the value under "Location/Region".
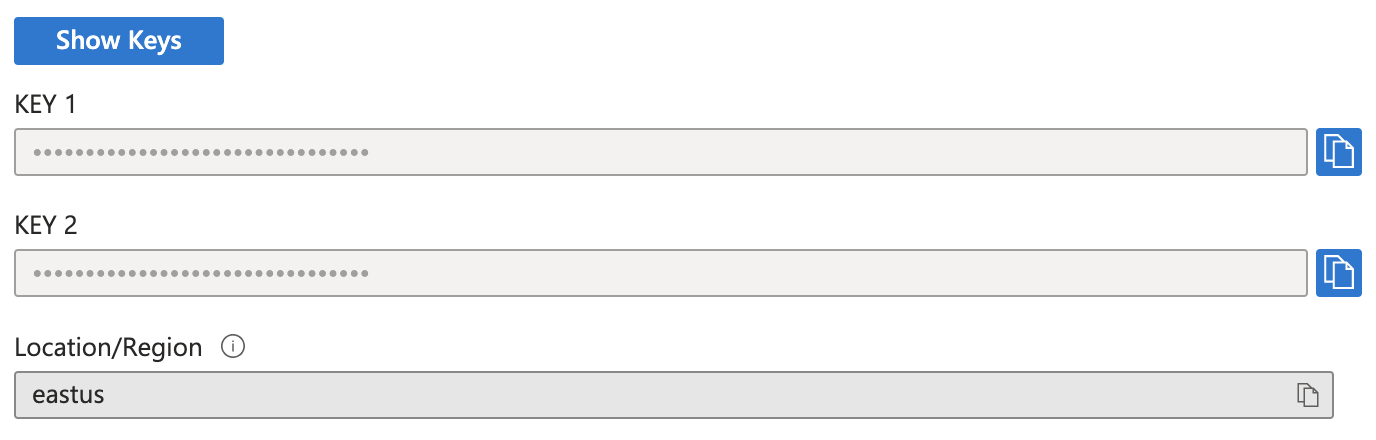 Microsoft Azure Project Credentials
Entering these credentials along with the domain of the running application, you can then enter your name, select the languages you will be speaking in, and read the translation. Share the URL and have a friend or two join your video session.
In this section, I will describe what is happening behind the scenes of the demo application. To be as code-agnostic as possible, I will be talking about methods in general and pointing to documentation so that you will be able to implement things in your programming language of choice. I built my demo application using NodeJS.
The video call is just a basic, regular video call like the one found in this sample project or one built using our new Video Web Components. The only difference is allowing the user to enter their name and the languages they want to use before starting a session.
Once the video call is happening, that means there is audio for the Audio Connector to start sending to a WebSocket server. If you are not sure how to create a WebSocket server, you can search for <your programming language> WebSocket server and hopefully, many tutorials and libraries will be in the search results. If not, there is always an AI chatbot you can ask. Haha
To start sending your audio streams to your newly created WebSocket server, Vonage provides a method in the various server SDKs (Java, NodeJS, PHP, Python, Ruby, .NET) to start a WebSocket connection. If you do not see your server-side language, you can also use a REST endpoint.
Now that your WebSocket server receives audio streams, it is time to start translating. Microsoft's Azure AI Speech Service can translate audio from more than 30 languages. Microsoft has Speech Service SDKs for C++, C#, Go, Java, JavaScript/NodeJS, Objective-C, and Python.
First, you will set your Speech Translation config with your key and region. In your languages SDK, there should be something similar to SpeechTranslationConfig with a fromSubscription that you can pass in your credentials. Where to set the speech recognition and target languages may depend on whether you send one combined stream or multiple individual streams.
On your WebSocket server, you will want to collect the data sent from the Audio Connector to translate with artificial intelligence. For that, a Push Stream for the Audio Input Stream will need to be created, at least in NodeJS. That is how it works.
Audio Connector sends different types of WebSocket messages:
There are text-based messages that include the initial message, updates when an audio stream is muted/unmuted, and when the connection is disconnected. These messages have the audio format information, data pertaining to the status of the connection, and any custom header data you sent when creating the connection.
The other type is binary audio messages that represent the audio stream. These are what you want to add to the Push Stream for the artificial intelligence to translate.
To differentiate between text-based and audio messages, I try to JSON parse the message. If I do not get an error, that means it is a text message. If I do get an error, that means it is a binary audio message that gets added to the Push Stream.
Now that we have an Audio Input Stream being supplied by the Push Stream, we need to configure the audio from the stream input so that the Speech SDK can analyze and translate the audio. To start “understanding” the stream, a Translation Recognizer is created using the Audio and Speech Translation configurations. The Translation Recognizer is then started to continuously try to recognize what is being said in the audio stream.
Partial translations will be fired as the Translation Recognizer tries to figure out what is being said. Once it has what it believes to be a complete understanding of what has been said in the sentence, a finalized translation will be presented.
We will then take those finalized translations as they are presented and send them into the video session through the Vonage Video Signal feature to be displayed on the participants' screens.
I thought it would be a cool feature to add the ability to mute all the video call participants and have the browser read out the translated text in a synthesized voice. If you try it out, let us know how it goes in the Developer Community Slack or on X, formerly known as Twitter. @VonageDev.